Brake discs are very important wear elements in a vehicle's mechanism. Therefore, if you decide to replace or repair the brake caliper yourself, and ensure a good repair, you should take into account several details.
If you are a professional or a freelance person who fixes your own car, in this Frenkit post we will explain you when and how to disassemble a brake caliper and how hard it is to change brake calipers that exist.
Maintenance plan for a brake caliper and when to dismantle it
The components of hydraulic brake systems are constantly exposed to enormous stresses. Due to cold, heat or vibrations, material fatigue can occur in the brake calipers of your vehicle over the course of time. In addition, water splashes, especially salt water, as well as dirt (dust, particles, etc.) cause corrosion, which hinders the movement of the vehicle components both externally and internally.
For safety reasons, it is important to be aware the special inspections and maintenance work must be carried out from time to time if we do not want to suffer from the brake caliper sticking. The best time to do this is at the end of the winter season, because the components of the braking system are more exposed to the weather. By a vehicle inspection and maintenance work we mean:
- Visual examinations.
- Functional checks and verifications.
- Internal examinations of wheel brakes.
- Braking system efficiency checks.

How to replace brake calipers assembly
In order to correctly paint a brake caliper, you must first know to replace brake caliper. Each type of brake caliper has certain steps that must be followed for proper brake caliper assembly maintenance:
Maintenance of front or rear floating brake caliper
- The first thing to know about how to disassemble a brake caliper is to clean the outside of the brake fluid deposit and the cap to prevent dirt from entering the circuit when the deposit is opened. With this step, check if the fluid level is lower than the minimum level marked on the deposit.
- Remove and disassemble the components.
- Wheels.
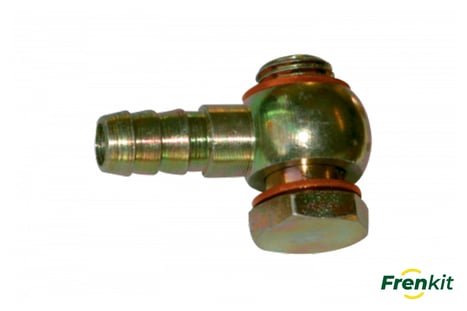
- Hollow bolt and fitting. Discard the washers from the hose and plug the hose to avoid contamination or loss of brake fluid. Prevent air from entering the system to make it easier to bleed later.
- Guide screws. Unscrew and discard the screws that assemble the guides to the clamp.
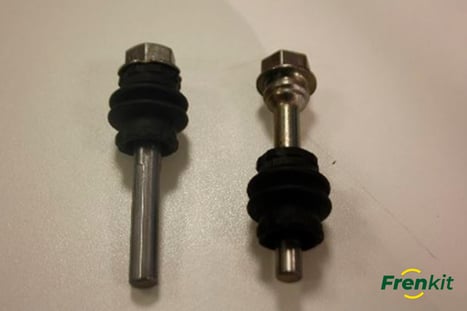
- Clamp body, guide rails and guide dust cap. You will need to disengage the caliper body from the caliper bracket. It may be necessary to back the pistons out to facilitate disassembly. Remove the guide bushes.
- Traction wire. Only if the brake caliper assembly is at the rear shall the parking brake rope be removed.
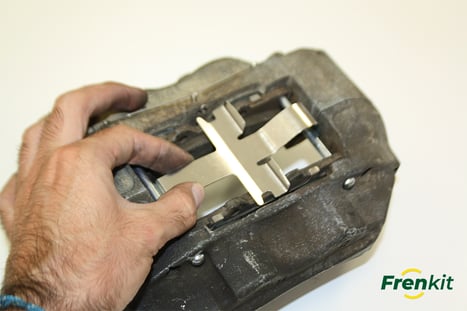
- Inner and outer pads and brake pad accessories.
- Caliper bracket mounting screws.
- Thoroughly clean any residue from the surface of the caliper bracket in the area of the brake pad fittings, as well as any grease and brake fluid residue from the brake caliper bracket guides and recesses.
- Inspect:
- Inner and outer pads. Replace the pads if the thickness is less than the manufacturer’s recommended thickness. It is important to replace both at the same time.

- Clamp bracket. Replace the clamp bracket if it is rusted, worn or damaged.
- Inner and outer pads. Replace the pads if the thickness is less than the manufacturer’s recommended thickness. It is important to replace both at the same time.
- Remove and dismantle:
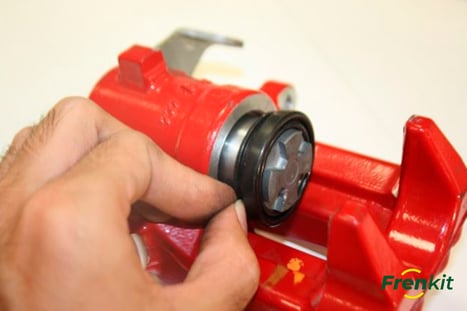
- Piston. Remove the pistons from inside the caliper. Suggestions for doing the from least to most accessible are as follows (keep your hands out of the brake caliper if air pressure is applied):
a) Use two screwdrivers to prise out the pistons without damaging the working area.
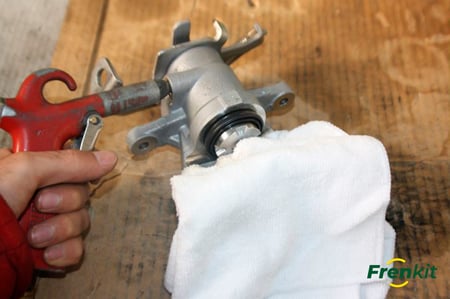
b) Place a towel or soft material between the pistons and the caliper body. Then apply a little pressurised air to the brake fluid inlet until they are completely out. Keep your hands away from the caliper if pressurised air is applied as the piston may come out at high speed.
c) With a claw extractor.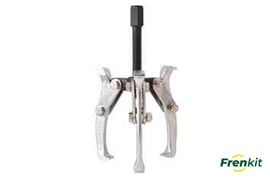 In the case of a rear caliper, remove the piston by operating the parking brake lever. To remove the internal components of the piston, use circlip pliers (pliers used to compress a clamp) to remove the clamp (retaining ring) that holds the components inside.
 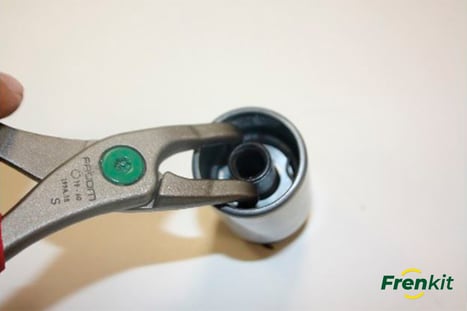 You can help yourself with pliers to remove the components inside the piston
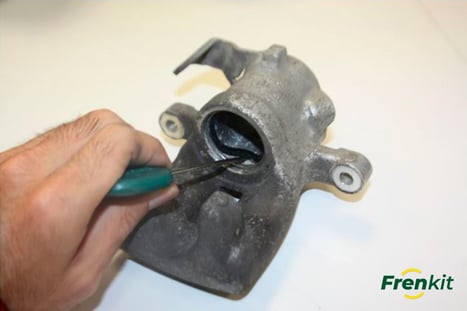
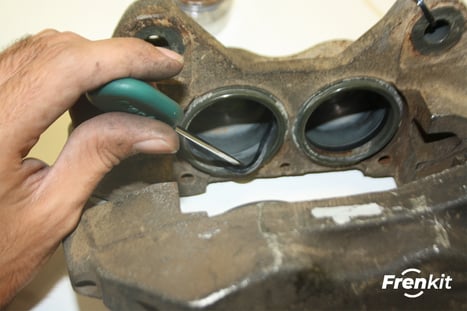
 - Piston dust cap and flat seal. Remove the seal taking care not to damage the groove in the caliper where it is located and discard the dust cap and seal.
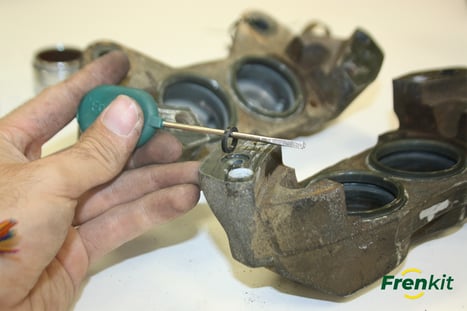
- Bleeder/purging.
- Parking brake lever and internal caliper components. In the rear brake caliper assembly, the bolts holding the parking brake lever and the brake line bracket must be removed.
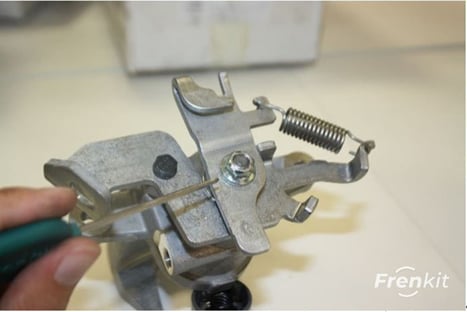 Next, remove the clamp that holds the internal components positioned inside the clamp and remove the components.
- Clean the piston, internal (rear caliper) components, caliper body and bleeder with denatured alcohol. Make sure that no through holes are obstructed. Blow dry with pressurised air (if not available let it dry without using anything that could contaminate it) and use, if necessary, a wire brush or a sand blower without damaging the inside of any holes in the caliper body (cover the holes with tape).
- Piston. Remove the pistons from inside the caliper. Suggestions for doing the from least to most accessible are as follows (keep your hands out of the brake caliper if air pressure is applied):
- Inspect:
- Piston. Replace the piston in case of scratches, nicks, corrosion, wear or obvious damage.
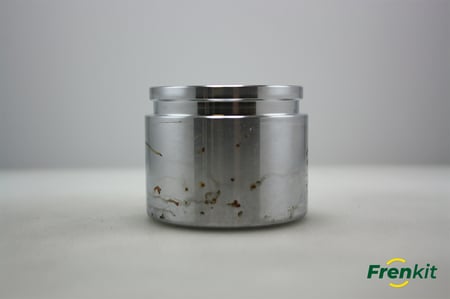
- Caliper body. Replaces the caliper body in case the interior where the pistons are located is damaged, corroded or damaged.
- Piston. Replace the piston in case of scratches, nicks, corrosion, wear or obvious damage.
- Install:
- Guide dust cap. Push the new dust cap over the small diameter end of the guide. Make sure that the inner lip of the dust cap sits in the groove of the guide.
- Components inside the piston. In case of a rear caliper with a parking brake mechanism, re-insert the checked components inside the piston in the correct order and position.
- Internal caliper components, again, in case of rear brake calipers you have to place the components in the correct order inside the caliper. To fit the clamp you will need to use a circlip caliper and then fit the brake lever and the brake line bracket.
- Guide dust cap. Push the new dust cap over the small diameter end of the guide. Make sure that the inner lip of the dust cap sits in the groove of the guide.
- Lubricate on the flat seals and grooves of the caliper body, on the surface of the pistons and guides using piston and guide grease, respectively.
- Install and connect:
- New seals. Insert the rubber seal into the groove inside the bore of the caliper body and make sure it is positioned correctly for proper sealing with the piston.
- New dust covers and pistons. Install the dust cap over the throat part of the piston and insert the piston into the caliper. Then fix the dust cap on the caliper.
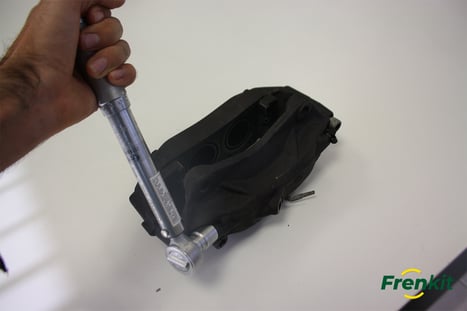
- Bleeder. Mount the bleeder on the clamp body. Tightening torque must be specified by the manufacturer.
- Guides in the clamp bracket. Insert the guides into the clamp bracket making sure that the dust covers are properly seated in the groove of the clamp.
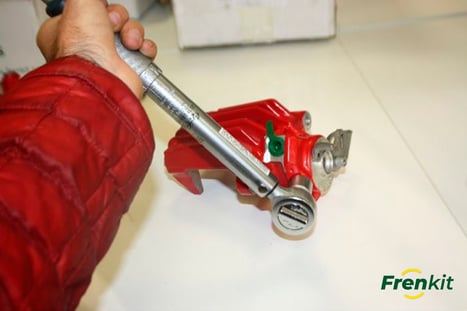
- Caliper. Mount the caliper bracket on the car with the respective bolts. The tightening force must be in compliance with the manufacturer's specifications.
- Plates (inner and outer pad on the caliper bracket). Hook the plates at both ends so as to engage tightly clamped together and fit the brake pads.
- Inspect the piston and dust cap. Check that the dust caps are correctly positioned in the piston groove.
- Connect:
- Assembly of the clamp body. Place the caliper body in the operating position. Make sure that the pads slide freely on the plates.
- New lead screws. The tightening torque must be as specified by the manufacturer.
- Install the bolt, new washers and fitting and screw them into the body. The tightening force shall be according to the manufacturer’s specifications.
- Assembly of the clamp body. Place the caliper body in the operating position. Make sure that the pads slide freely on the plates.
- Inspect: Check for leaks, if any check the caliper or connecting pipes and correct the fault. Check the brake master cylinder reservoir level and top up to the specified level with fresh brake fluid. Start the engine and press the pedal slowly and firmly three times to ensure that the piston remains in the operating position. You should also pull the handbrake to check that the mechanism operates correctly and compresses the brake disc. Check the brake fluid level again, as it may have dropped as it is distributed through the system.
- Purge: Make sure there is no air left inside the system.
- Connect the wheel. The tightening torque of the wheel bolts must be in accordance with the manufacturer’s specifications.
![[Learn about the advantages and disadvantages of outsourcing the repair of your car's brake calipers and master cylinders]](https://no-cache.hubspot.com/cta/default/7520036/170b6983-48b6-4cb4-8442-546fe7c9540d.png)
Fixed brake caliper maintenance
- Dismantle:
- Clean the outside of the master cylinder reservoir and the cap to prevent dirt from entering the circuit when the reservoir is opened. With this step, check if the fluid level is lower than the minimum level marked on the reservoir.
- Wheel.
- Hollow bolt and fitting. Discard the washers from the hose and plug the hose to avoid contamination or loss of brake fluid. Prevent air from entering the system to facilitate subsequent bleeding.
- Mounting screws and clamp. Remove the screws holding the clamp and unclamp it.
- Brake pad wire, pins and fittings. Remove the components that are clamping the brake pads. As there are many types of fixed calipers, the components may be slightly, but the aim is still to free the pads.
- Tablets and sheets.
- Inspect:
- Inner and outer pads. Replace the pads if the pad thickness is less than the manufacturer’s recommendation. Always replace all pads on the same axle at the same time.
- Brake pad wire, pins and fittings. Replace the components in case of wear or damage. From Frenkit we recommend you to change them every time they are checked.
- Dismantle:
- Pistons. Remove the pistons from inside the caliper. Suggestions for doing this from least to most accessible are as follows:
a) Lever the pistons out with two screwdrivers without damaging the working area.
b) Place a towel or soft material between the pistons and the caliper body. Then apply a small amount of pressurised air to the brake fluid inlet until they are completely out. Keep hands away from the caliper if pressurized air is applied as the piston may come out at high speed.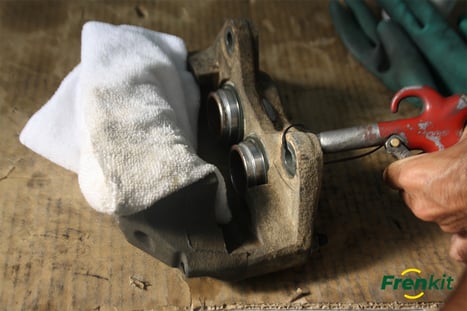 c) With a claw puller.
 - Piston dust cap and flat seals. Remove the rubber seal taking care not to damage the groove in the caliper where it is located. Discard the dust cap and seal.
- Bleeder/Purging.
- Clamp screws. Clamp bolts are easiest to remove with an impact screwdriver drill, although it can also be done by hand. When you pull them apart, between the two contact faces, you will find a flat rubber seal that seals the holes on both sides of the clamp. Discard the flat seal.
- Pistons. Remove the pistons from inside the caliper. Suggestions for doing this from least to most accessible are as follows:
- Clean:
- Caliper. Use a brake cleaner to remove all surface dirt. If necessary, use a wire brush or sand blower without damaging the inside of any holes in the caliper body (cover the holes with tape).
- Piston(s) and bleeder. Use denatured alcohol for cleaning. Make sure that no through holes are obstructed. Blow dry with pressurised air (if not available, wipe with a clean cloth that cannot contaminate it).
- Inspect:
- Piston(s). Replace piston(s) in case of cracks, nicks, corrosion, wear or obvious damage.
- Caliper. Replace the caliper if the inside where the pistons are located is scratched, corroded or damaged.
- Piston(s). Replace piston(s) in case of cracks, nicks, corrosion, wear or obvious damage.
- Lubricate the flat seals and grooves of the caliper with enough piston grease on the inside of the seal and inside of the caliper and pistons, using enough piston grease on the outside surface.
- Connect and install:
- New seals. Insert the seal into the groove inside the bore of the caliper body and make sure it is positioned correctly for proper sealing with the piston.
- New dust covers and pistons. Install the dust cap over the throat portion of the piston and insert the piston into the caliper, then position and tighten the dust cap into position.

- Bleeder. Mount the bleeder on the clamp body. The tightening torque must be as specified by the manufacturer.
- Clamp screws. Place the small flat seal on the connecting surface of both parts of the clamp. Lubricate the screws and join both parts of the clamp.
- Inspect the piston and dust cap. Check that the dust caps are correctly fitted in the piston groove.
- Connect and install:
- Pads together with pins, brake pad fittings and wire. Insert the pins through the caliper and through the pads, Squeeze the pins with the wire and then place between the pads.
- Clamp. Mount the caliper on the car with the mounting bolts. The tightening force shall be in accordance with the manufacturer’s specifications.
- Hollow bolt, washers and fitting. Install the bolt, new washers and fitting, then screw them into the caliper. The tightening force shall be in accordance with the manufacturer’s specifications.
- Pads together with pins, brake pad fittings and wire. Insert the pins through the caliper and through the pads, Squeeze the pins with the wire and then place between the pads.
- Inspect: Check for leaks, if any check caliper and correct error. Check the master cylinder reservoir level and top up to the specified level with fresh brake fluid. Start the engine and depress the pedal slowly and firmly three times to ensure that the piston remains in the operating position. Check the brake fluid level again, as it may have dropped as it is distributed through the system.
- Connect and install the wheel. The tightening torque of the wheel bolts must be in accordance with the manufacturer’s specifications.
Now that you know how to disassemble a brake caliper, at Frenkit, a brake part distributor, we offer a service based on commitment and customer satisfaction. Are you a professional or do you fix your own car? Access our user area and find the reference you need or take a look at our catalogues.
Also discover how to release the electric parking brake on our blog.